Debian 11, codenamed bullseye, has been released! This step by step guide explains how to upgrade to Debian 11 bullseye from Debian 10 buster from command line.
Debian 11 "bullseye" is released
The long wait is over! Debian 11, codenamed "bullseye", stable version is available for download!!
Thanks to the combined work of the Debian Security team and the Debian Long Term Support team, Debian 11 will be supported for next 5 years.
The new Debian 11 distribution ships with many different desktop environments (DE) and several updated applications.
Debian 11 currently includes the following DEs:
- Gnome 3.38,
- KDE Plasma 5.20,
- LXDE 11,
- LXQt 0.16,
- MATE 1.24,
- Xfce 4.16.
For more details, check the Debian 11 "bullseye" release notes.
Upgrade to Debian 11 bullseye from Debian 10 buster
Let us check the currently installed Debian version using command:
$ cat /etc/debian_version
10.10
You can also use lsb_release command to display Debian version.
$ lsb_release -a
Sample output:
No LSB modules are available.
Distributor ID:	Debian
Description:	Debian GNU/Linux 10 (buster)
Release:	10
Codename:	buster
As you see in the above output, I am using the latest Debian 10 buster system. Now, let us start to upgrade Debian 10 buster to Debian 11 bullseye.
Step 1 - Update and upgrade all currently installed packages
Before we start upgrade Debian buster to bullseye, make sure you've updated and upgraded all existing packages to their latest available version by running the following commands one by one:
$ sudo apt update
$ sudo apt upgrade
$ sudo apt dist-upgrade
And then clean any leftover packages and configuration files using commands:
$ sudo apt autoremove
$ sudo apt autoclean
$ sudo find /etc -name '.dpkg-' -o -name '.ucf-' -o -name '*.merge-error'
Reboot your system to apply all updates.
$ sudo reboot
Step 2 - Backup your data
The next important step is backup. Make sure you have taken backup of all important personal files, directories and configuration files.
The important things you'll want to back up are the contents of /etc, /var/lib/dpkg, /var/lib/apt/extended_states and the output of dpkg --get-selections "*" (the quotes are important) command.
You can also use any one or two of the following backup applications to backup the data and system settings in your Debian Linux system.
- Rsync - A powerful command line utility to backup personal data and $HOME directory.
- Deja Dup - A simple GUI utility to backup personal data.
- Timeshift - A graphical application to backup system files and settings.
- Restic - A command line utility to save multiple revisions of files and directories in an encrypted repository stored on different backends.
- Rsnapshot - A command line utility to create periodic snapshots of local machines, and remote machines over ssh.
I personally use Deja Dup and Timeshift for backup. You can pick any one or more of your choice from the above list.
Step 3 - Update software repositories
Before updating the software repositories in Debian buster, first backup the current software source list.
$ mkdir ~/apt
$ sudo cp /etc/apt/sources.list ~/apt
$ sudo cp -rv /etc/apt/sources.list.d/ ~/apt
Verify the contents of ~/apt directory to make sure the software repository lists have been copied.
$ ls apt/
sources.list sources.list.d
Now we need to update the current repository list to point to Debian 11 repositories.
To replace and update Debian 10 repositories with Debian 11 repositories, run:
$ sudo sed -i 's/buster/bullseye/g' /etc/apt/sources.list
$ sudo sed -i 's/buster/bullseye/g' /etc/apt/sources.list.d/*
Now verify if the sources list file is updated with new repository links:
$ cat /etc/apt/sources.list
Sample output:
deb http://deb.debian.org/debian/ bullseye main
deb-src http://deb.debian.org/debian/ bullseye main

deb http://security.debian.org/debian-security bullseye/updates main
deb-src http://security.debian.org/debian-security bullseye/updates main

# bullseye-updates, previously known as 'volatile'
deb http://deb.debian.org/debian/ bullseye-updates main
deb-src http://deb.debian.org/debian/ bullseye-updates main

# This system was installed using small removable media
# (e.g. netinst, live or single CD). The matching "deb cdrom"
# entries were disabled at the end of the installation process.
# For information about how to configure apt package sources,
# see the sources.list(5) manual.
Heads Up: For Debian bullseye, the security suite is now named bullseye-security instead of codename/updates and users should adapt their APT source-list files accordingly when upgrading.
So we need to update the security lines in the APT configuration file.
Find the following lines in your sources.list file:
deb http://security.debian.org/debian-security bullseye/updates main
deb-src http://security.debian.org/debian-security bullseye/updates main
And replace them with following lines:
deb https://deb.debian.org/debian-security bullseye-security main contrib
deb-src https://deb.debian.org/debian-security bullseye-security main contrib
After changing the security lines, the final APT sources.list file should look like below:
deb http://deb.debian.org/debian/ bullseye main
deb-src http://deb.debian.org/debian/ bullseye main

deb https://deb.debian.org/debian-security bullseye-security main contrib
deb-src https://deb.debian.org/debian-security bullseye-security main contrib

# bullseye-updates, previously known as 'volatile'
deb http://deb.debian.org/debian/ bullseye-updates main
deb-src http://deb.debian.org/debian/ bullseye-updates main

# This system was installed using small removable media
# (e.g. netinst, live or single CD). The matching "deb cdrom"
# entries were disabled at the end of the installation process.
# For information about how to configure apt package sources,
# see the sources.list(5) manual.
As you see in the above output, the sources.list file is updated with new Debian 11 repository links. Save the file and exit.
Update the repository lists using command:
$ sudo apt update
Step 4 - Perform minimal system upgrade
In some cases, doing a full system upgrade (which is explained in the next step) will remove large number of packages that you want to keep. So Debian developers recommends two-part upgrade process, namely minimal upgrade and full upgrade.
The minimal upgrade will upgrade all existing packages without installing or removing any other packages.
First, you need to do minimal upgrade using command:
$ sudo apt upgrade --without-new-pkgs
Keep an eye on the screen. During the upgrade process, you'll be asked to answer a few questions like what do you want to do with a configuration file or if you want to restart a service etc. The questions may vary depending upon the number of installed packages in your current Debian system.
If the apt-listchanges package is installed,
it will show important information about upgraded packages in a pager
after downloading the packages. Press ENTER to read the information or
simply press q to exit and return back to the upgrade process.
Next
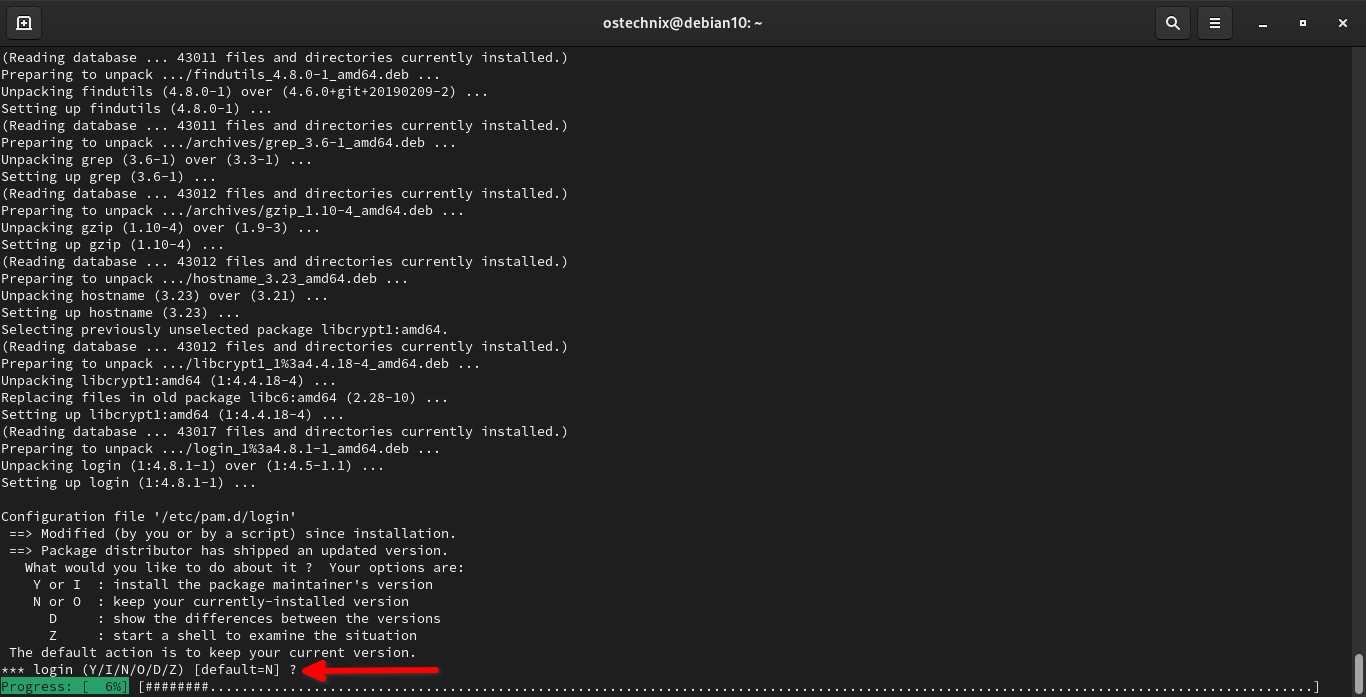
you will be asked what do you want to do with a specific configuration
file ( E.g. pam login file). Read the instructions on the screen and
decide accordingly. If you're not sure what to do, just go with defaults
by simply pressing ENTER key:
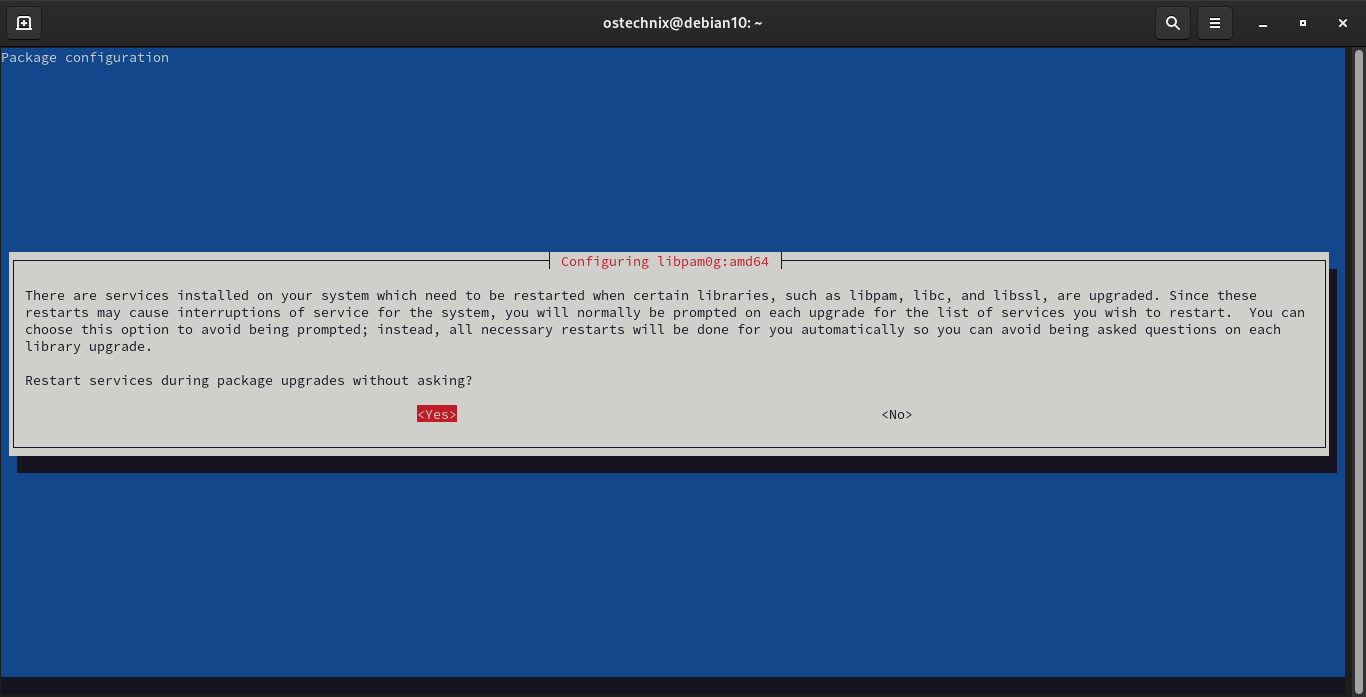
Many services installed on your Debian system need to be restarted when certain libraries, such as libpam, libc, and libssl,
are upgraded. Since these restarts may cause interruptions of service
for the system, you will normally be prompted on each upgrade for the
list of services you wish to restart. If you want to avoid being asked
such questions on each library upgrade choose Yes and press ENTER to continue.
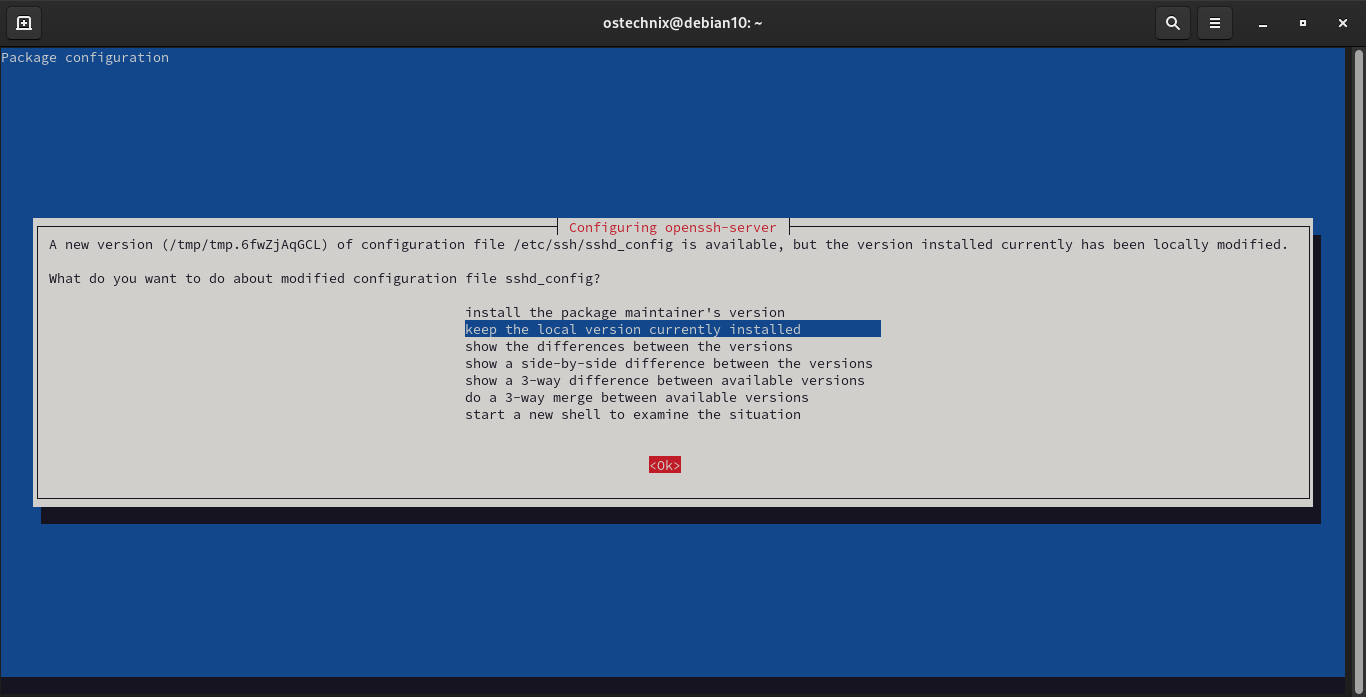
Next the installer will prompt what do you want to do about modified configuration file sshd_config. Select any one of the given choices and choose OK and press ENTER to continue.
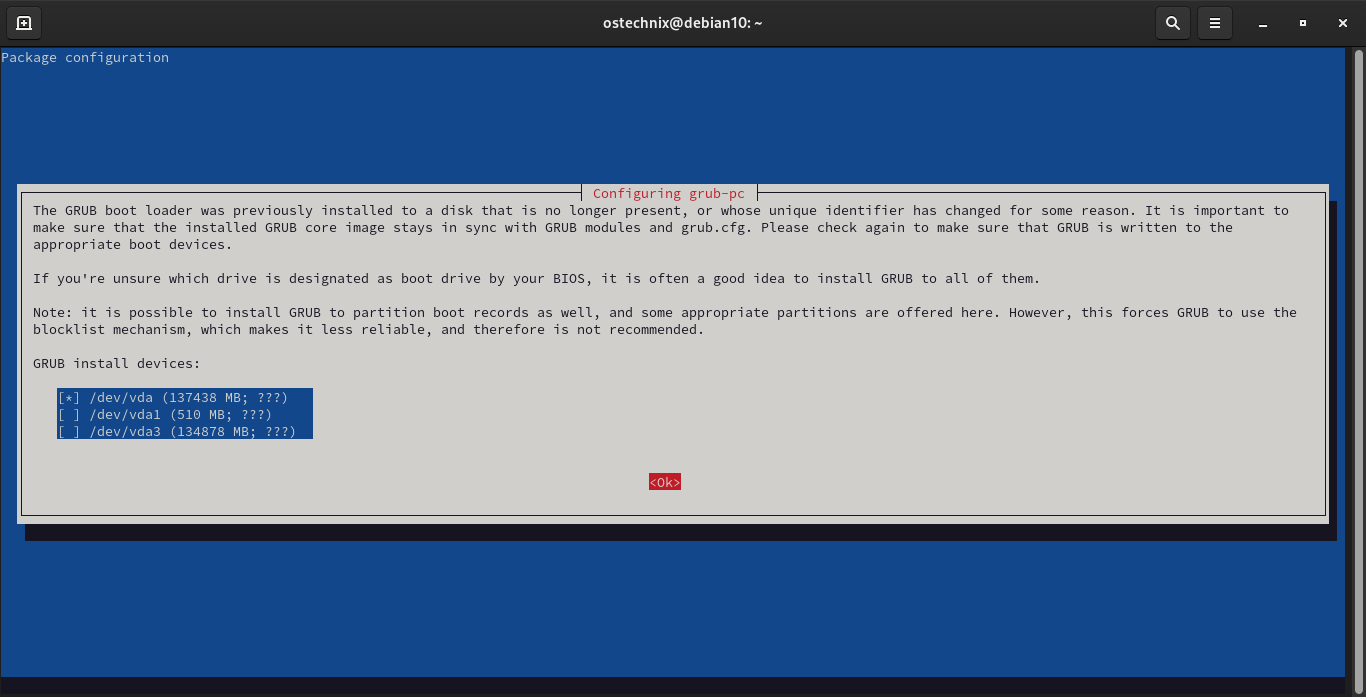
Choose where do you want to install Grub and select OK and press ENTER key to continue.
The minimal upgrade process will complete in a few minutes.
Step 5 - Upgrade to Debian 11 bullseye
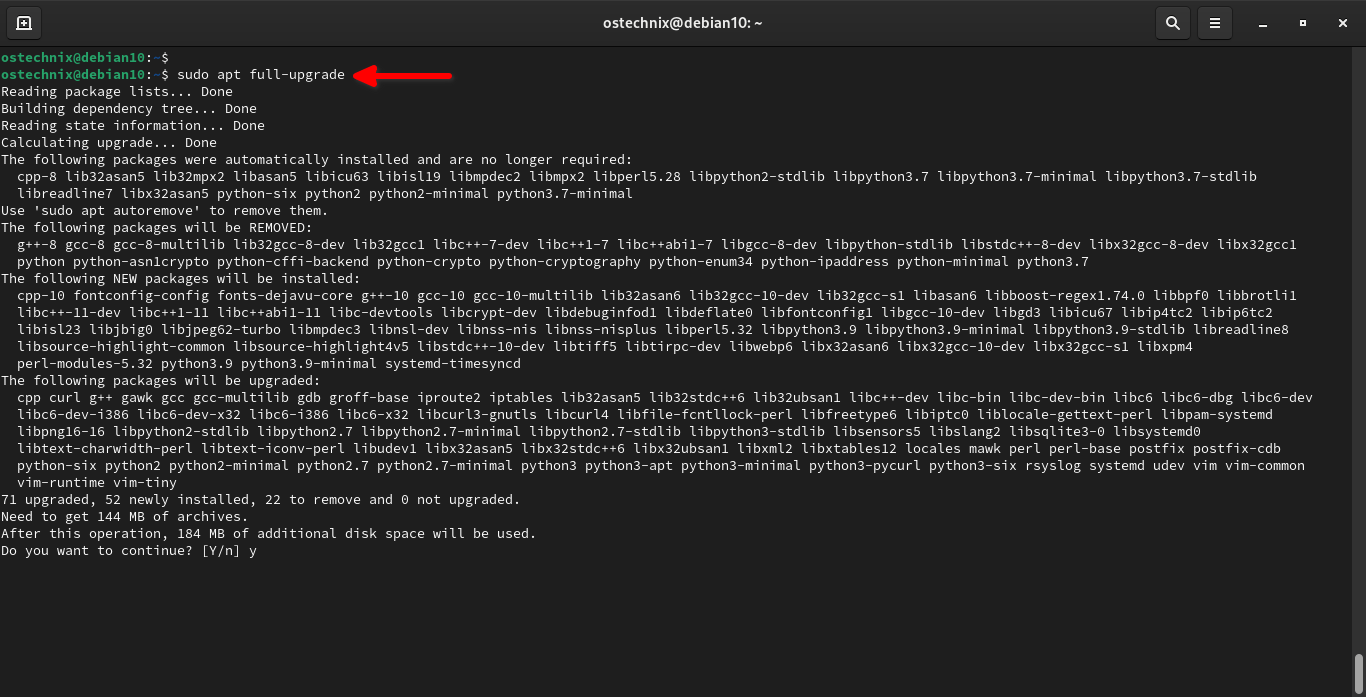
Now start the actual Debian 11 bullseye upgrade using command:
$ sudo apt full-upgrade
Again, you need to keep an eye on the screen and answer all questions that might come up as usual.
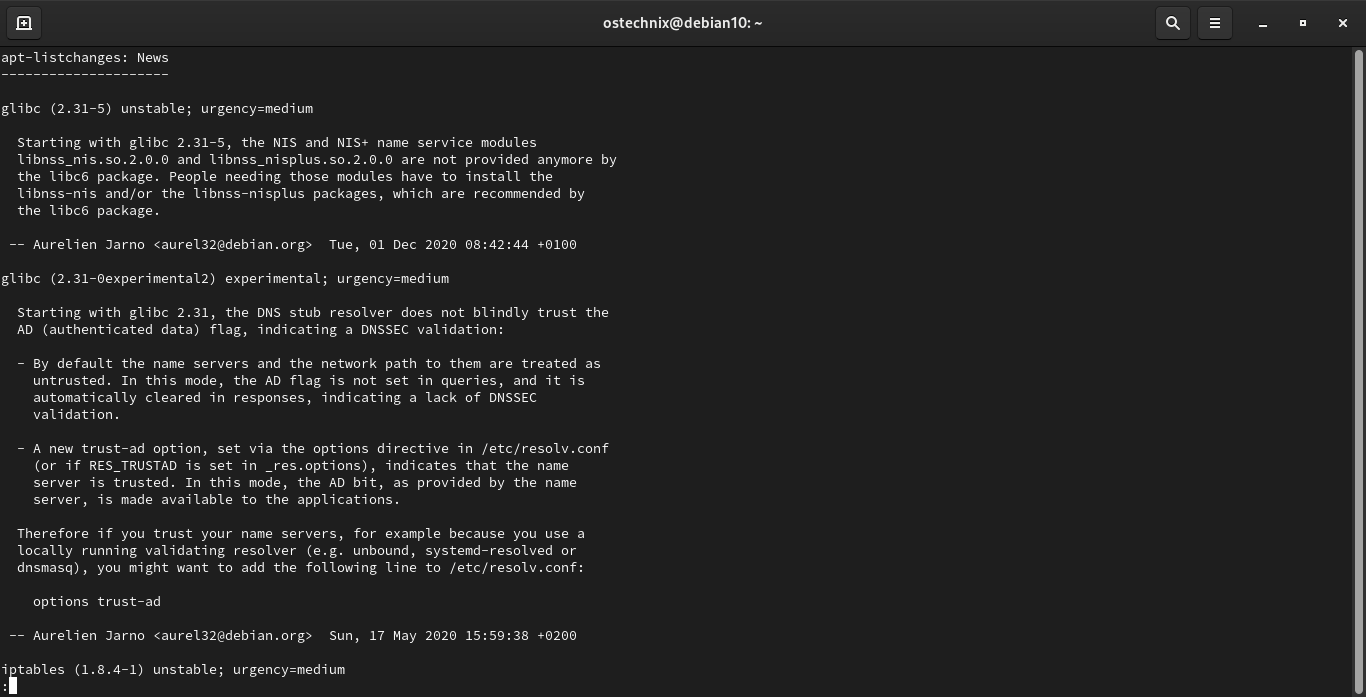
As stated earlier, if the apt-listchanges
package is installed, it will show important information about upgraded
packages in a pager after downloading the packages. Press q to quit after reading the information and continue upgrade.
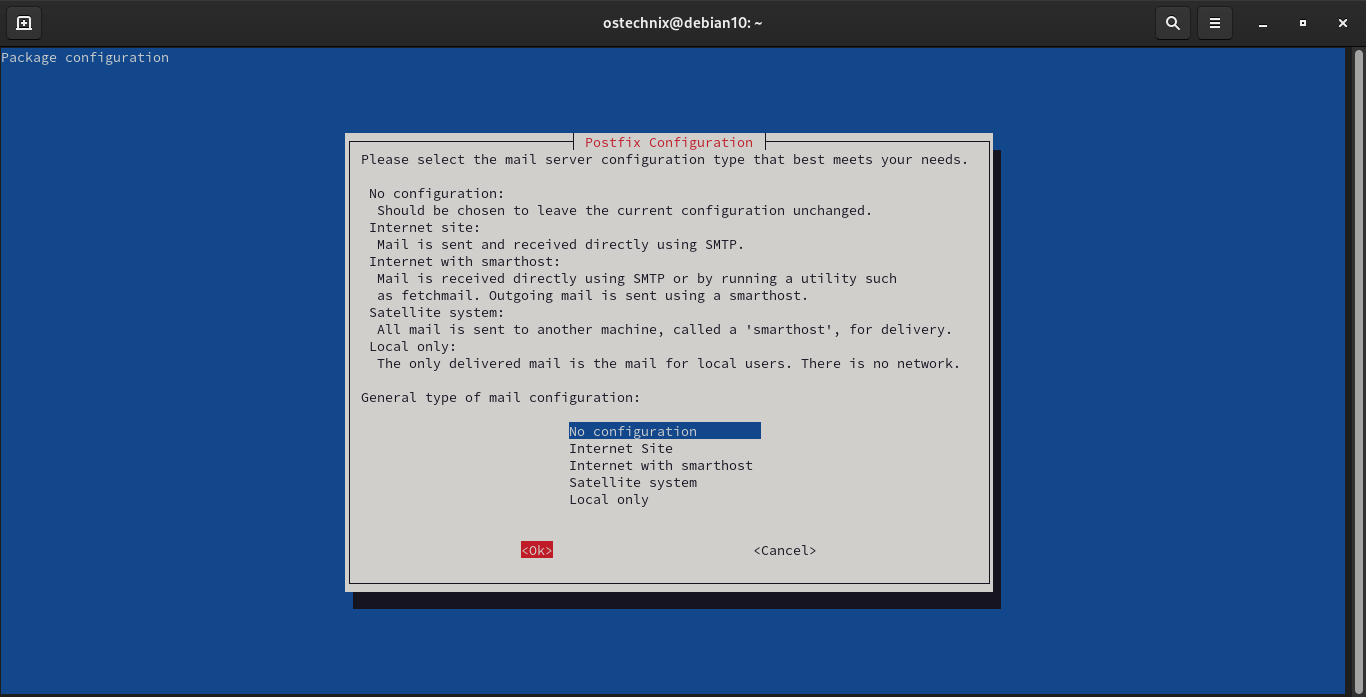
Select the mail server configuration type from the list, and choose Ok and press ENTER to continue:
Once the Debian 11 upgrade process is completed, reboot your system:
$ sudo reboot
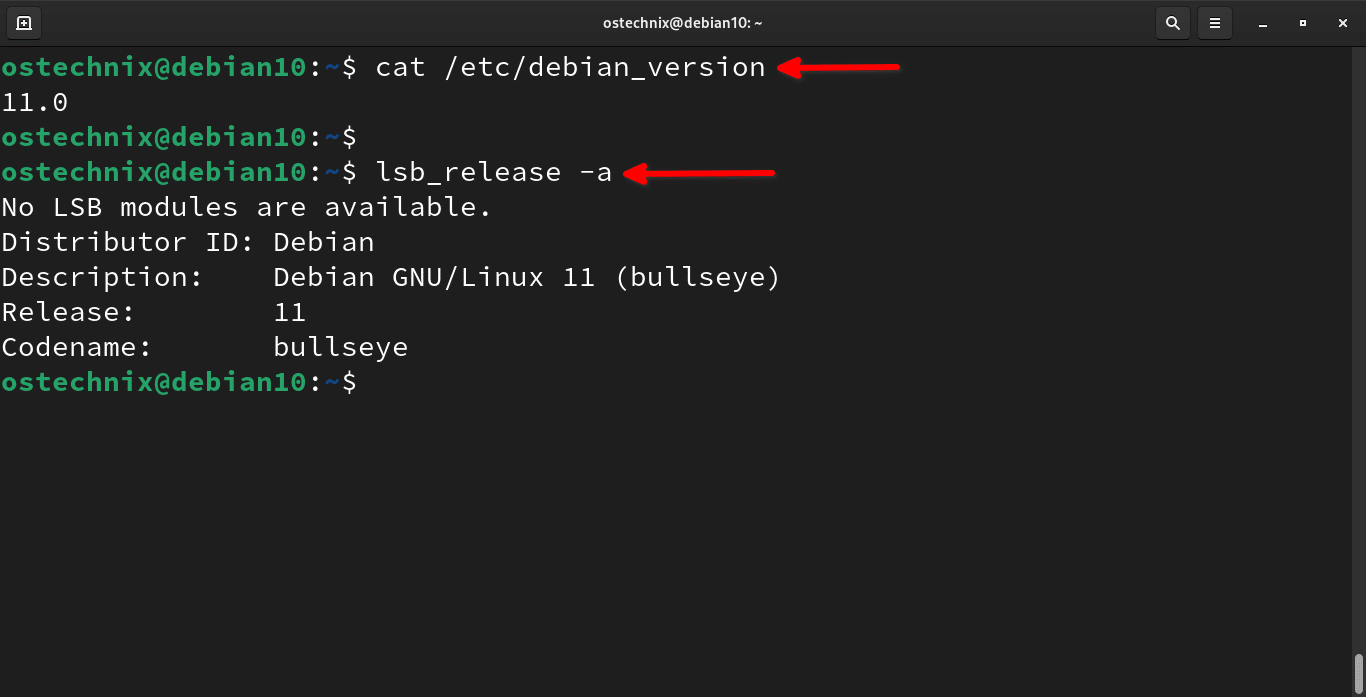
Log in to the system and Check Debian 11 bullseye version using command:
$ cat /etc/debian_version
11.0
Or, use lsb_release command:
$ lsb_release -a
Sample output:
No LSB modules are available.
Distributor ID:	Debian
Description:	Debian GNU/Linux 11 (bullseye)
Release:	11
Codename:	bullseye
Congratulations! We have successfully upgraded Debian 10 buster to Debian 11 bullseye.
Optionally, you can remove all packages that are no longer required using commands:
$ sudo apt --purge autoremove
$ sudo apt autoclean
Step 6 - Verify if everything works fine
Log in to your newly upgraded Debian 11 system and check everything works fine. You may need to open and/or run a few installed applications and verify if they are working as usual. If something breaks your system, please let us know in the comment section or reach out to your Debian forum.
Debian 11 is just released (August 14, 2021), so you may expect some minor glitches. But in my case, the upgrade process was smooth and everything worked just fine.
Step 7 - Restore the backup
Once everything works as expected, restore the backup which you've taken before upgrading your system.
Install new applications of your choice and start using Debian 11 bullseye edition!
TL;DR (TOO LONG DIDN'T READ)
Basically, Debian 11 bullseye upgrade process consists of the following steps:
- Update all existing packages
sudo apt updatesudo apt upgrade
- Restart system
sudo reboot
- Backup important data
- Update software repositories
sudo sed -i 's/buster/bullseye/g' /etc/apt/sources.listsudo sed -i 's/buster/bullseye/g' /etc/apt/sources.list.d/*
- Perform minimal upgrade
sudo apt upgrade --without-new-pkgs
- Upgrade to Debian 11 bullseye
sudo apt full-upgrade
- Restart system
sudo reboot
Hope this helps.
from:
https://ostechnix.com/upgrade-to-debian-11-bullseye-from-debian-10-buster/


Comments
Post a Comment
https://gengwg.blogspot.com/